
Vista lets you capture selected parts of your screen
Ever wondered how those pictures of this or that computer activity got into a story you’re reading, or a thrilling book about computers?
The trick is called Print Screen and it’s a relatively easy operation. Except it requires a bit of post-surgical treatment. Why? Because the picture you get using Print Screen includes the entire screen, and you only want a specific part of it.
Sure you can crop and edit the image afterwards, using whichever picture editor you fancy, but wouldn’t it be nice if you could just capture the section of the screen you want in the first place?
Print Screen has been a feature of Windows for a long time. It even made it all the way to become a button key on keyboards.
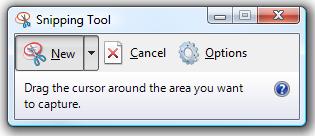
Now, with Vista, you can go that one necessary step beyond your run-of-the-mill Print Screen command. Type ‘snipping’ into the search box to find the built-in Vista Snipping tool. When the tool shows up in the search box, click it to open it. This tool allows you to highlight a section of the screen and save it as a picture file.
It’s odd that it’s usually hidden from view, but it does offer to be added to the quick start bar.
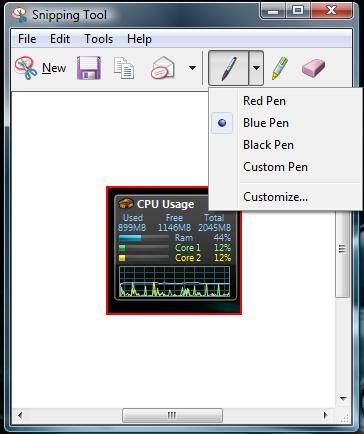
It’s very simple and straightforward to use. Just hold the left mouse button down and move the mouse. Draw a box over the item you want to capture. Let go of the mouse button. Voila, your captured screen shot has been saved to the snipping tool. From here, the tool allows you to highlight and mark the captured image. This is great for adding more detail to the capture. Once you’ve made any notes or highlighted any part of the capture, you just hit save and the captured image is saved to your computer.
It’s a small hidden gem that makes capturing screen shots just a bit easier.